18' Custom Cabinet -- in progress
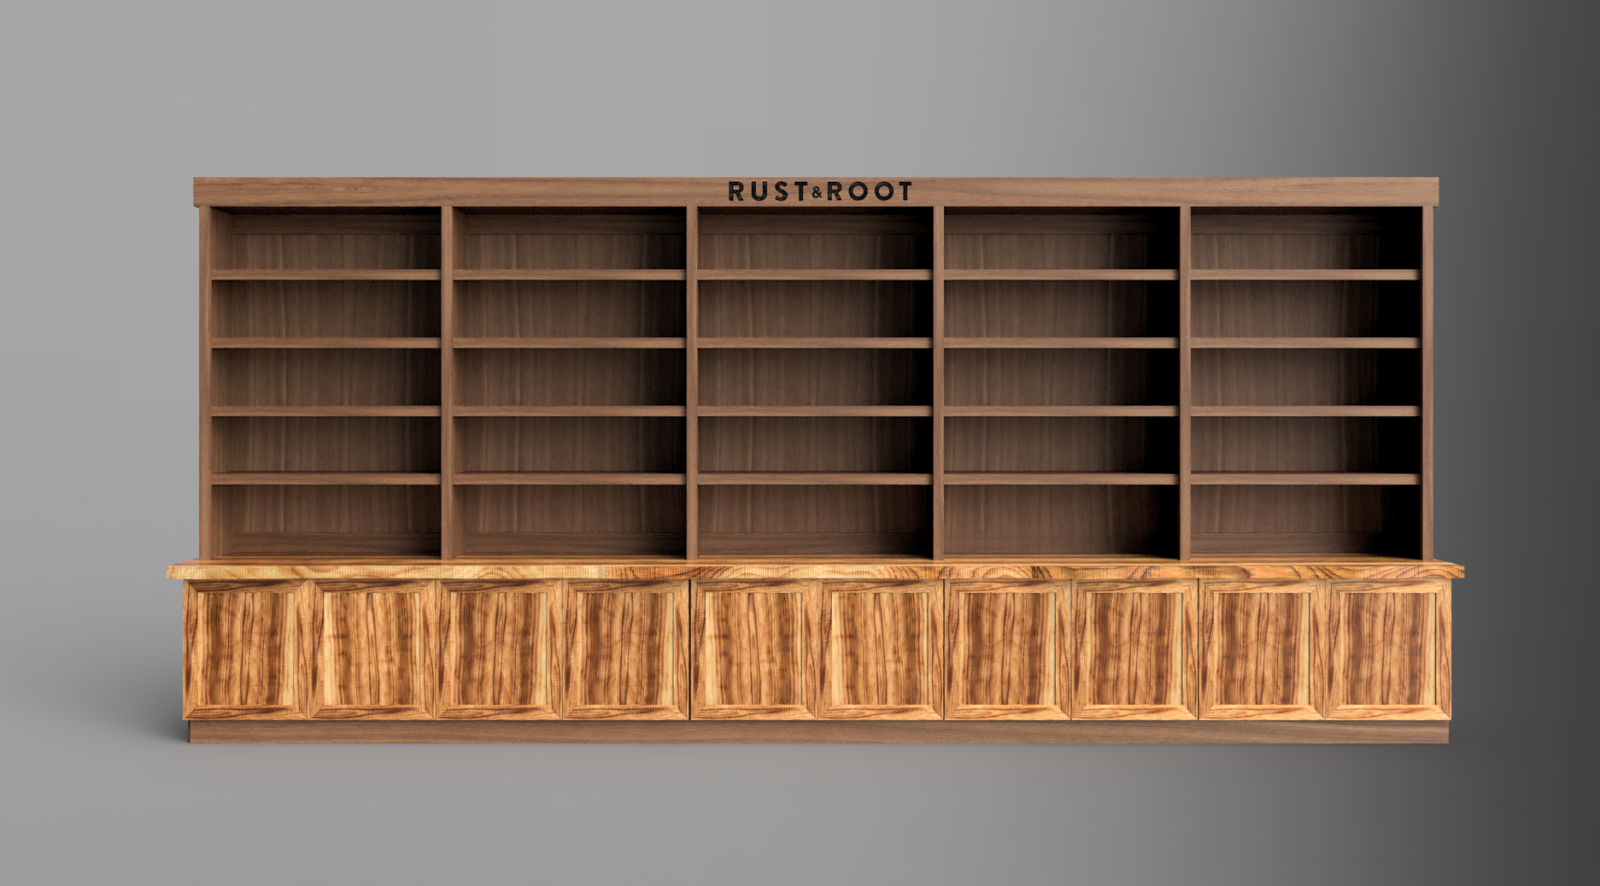
Pretty quickly after installing the last built in cabinet, a Kailua resident saw the picture of the finished piece and commissioned a similar piece for her home. The first cabinet was eleven feet long, going from the start to the end of a wall. The new project is eighteen feet long, going from wall to wall. It will have similar construction methods and wood choices, with sapele cabinetry and trim. The sapele will be accented by a monkeypod slab countertop and matching monkeypod doors. I made a 3D rendering to show the client what it would look like, approximately.
To keep to the client's desired time frame, I had to look for help to get the cabinets built. Eighteen feet of cabinets is quite a lot, and it was way too much labor for me to do in a couple of weeks. Luckily, I have amazing neighbors around my shop and I contracted Adam Baker, a very talented furniture and cabinet maker, to make all of the casework. Casework is a term used for the actual cabinet boxes. Adam has also been indispensable in helping with the installation process, so thanks Adam!
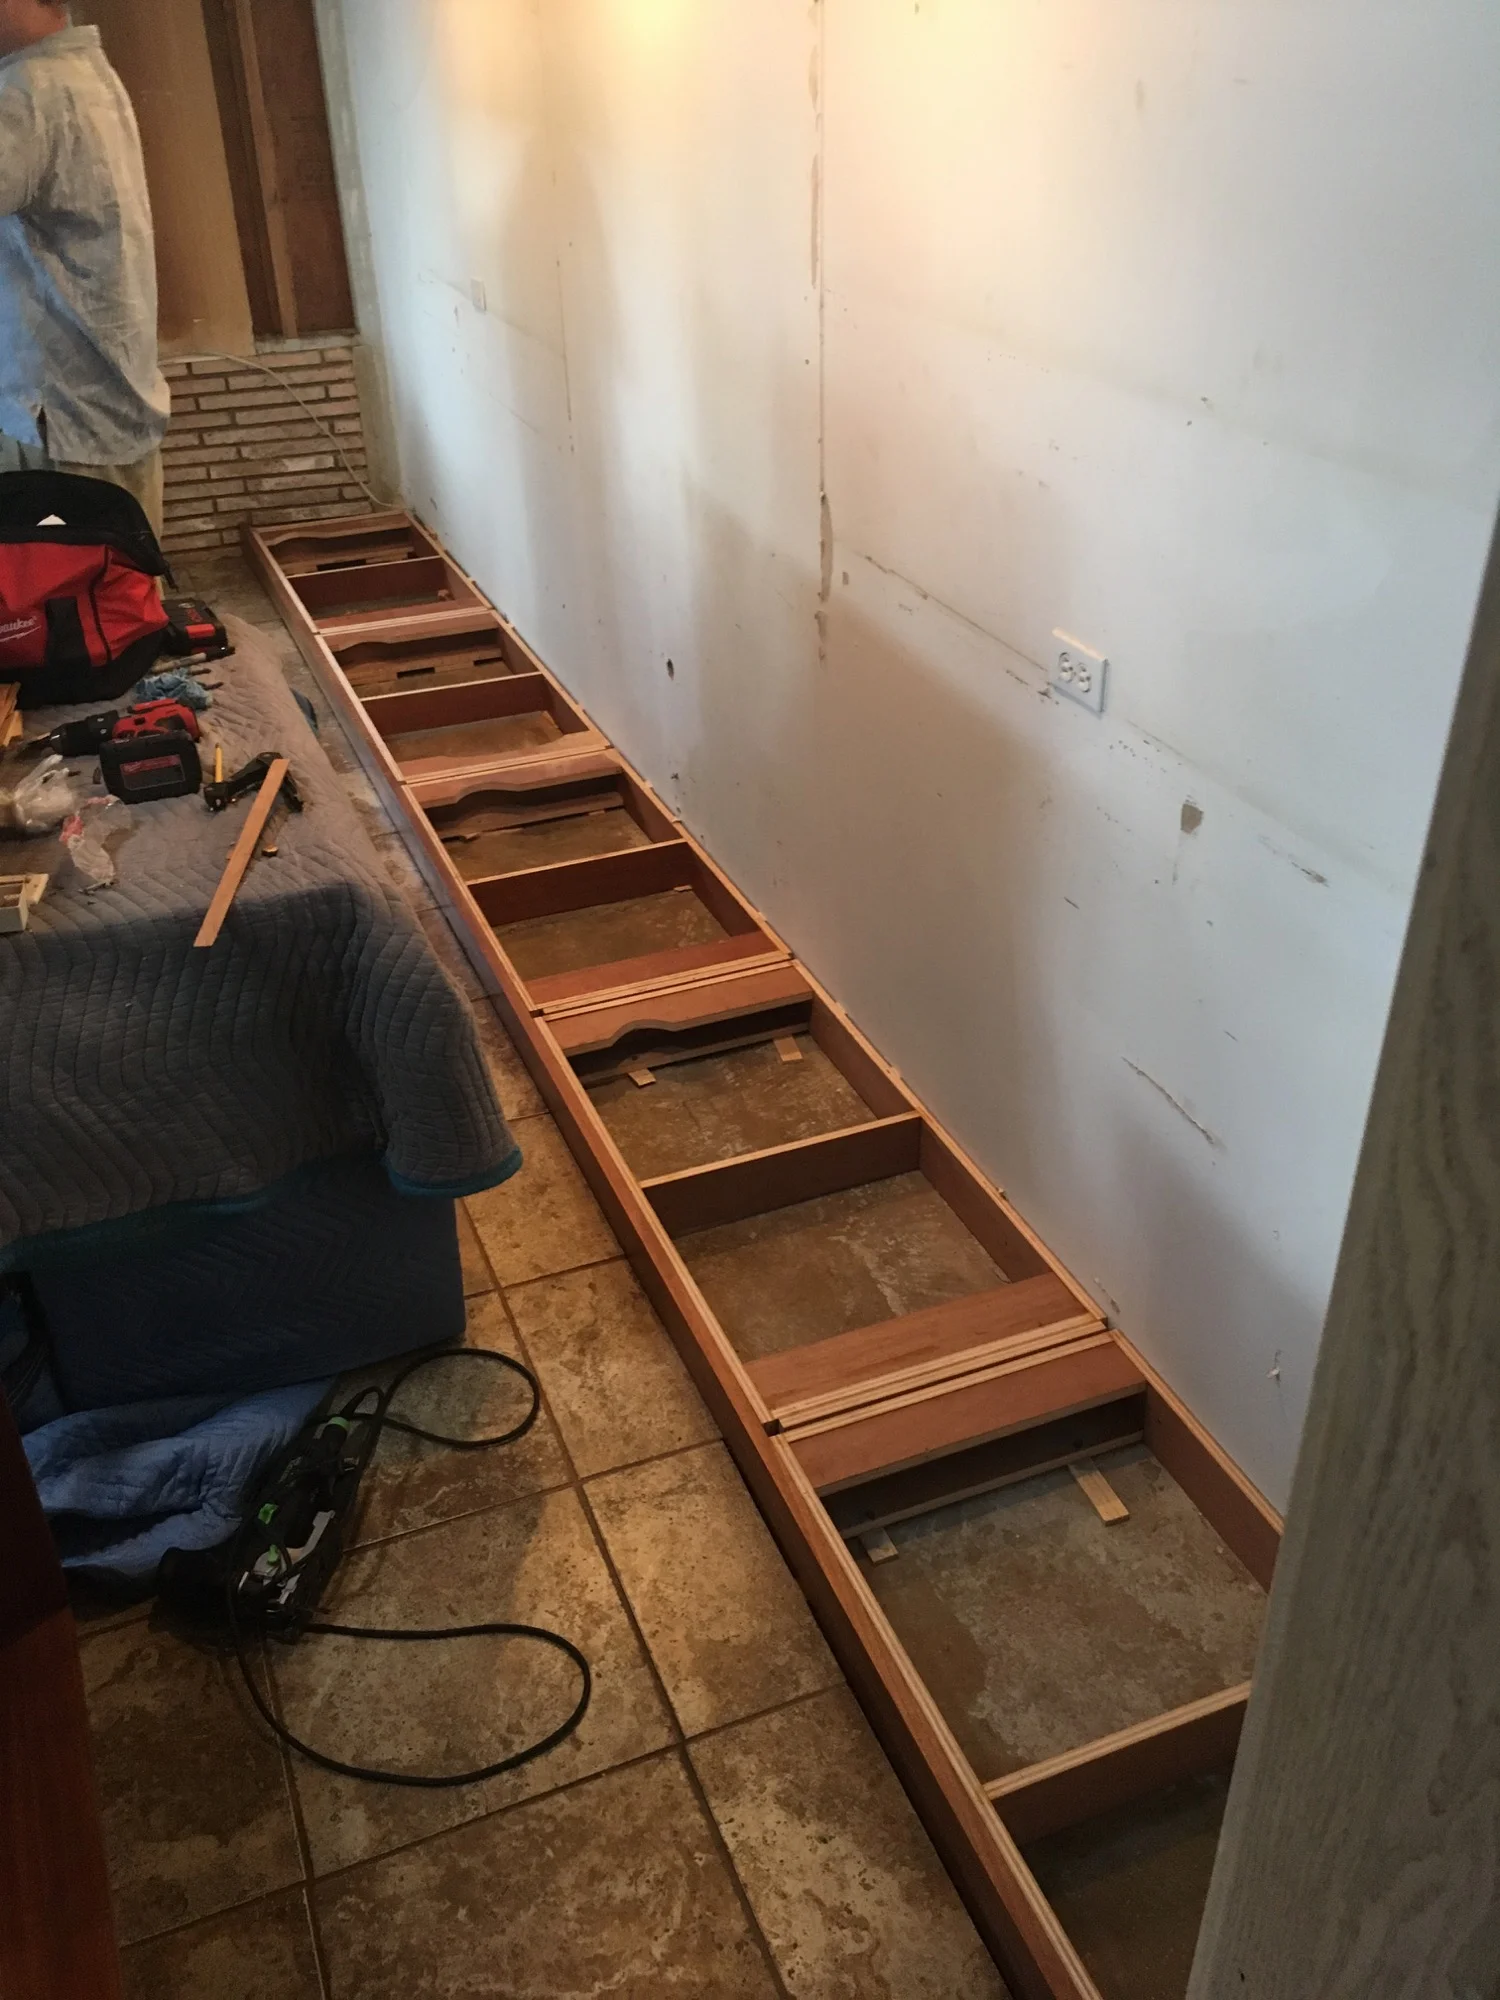
I'm going to go through the first steps of installing the cabinets, and hopefully explain a little bit of the process. In the below picture, you can see all of the toe kicks installed. This part of the installation is very time consuming, but crucial to get perfect. Essentially, what we're doing here is setting up a flat surface to but the lower cabinet boxes on. We wish that floors and walls were perfectly flat and square, but in reality they never are. This concrete floor, for example, drops 3/4" over the eighteen foot span. To correct this, we'll set a reference point and then shim the toe kicks to end up completely level. The toe kicks are also anchored to the concrete subfloor, which sets a super solid foundation for the rest of the cabinetry. You can also see in the below photo that the finished trim is installed in front of the toe kicks. We screwed the finished trim onto the toe kicks from the back, so you can't see any screw or nail holes in the trim. Clean as possible!
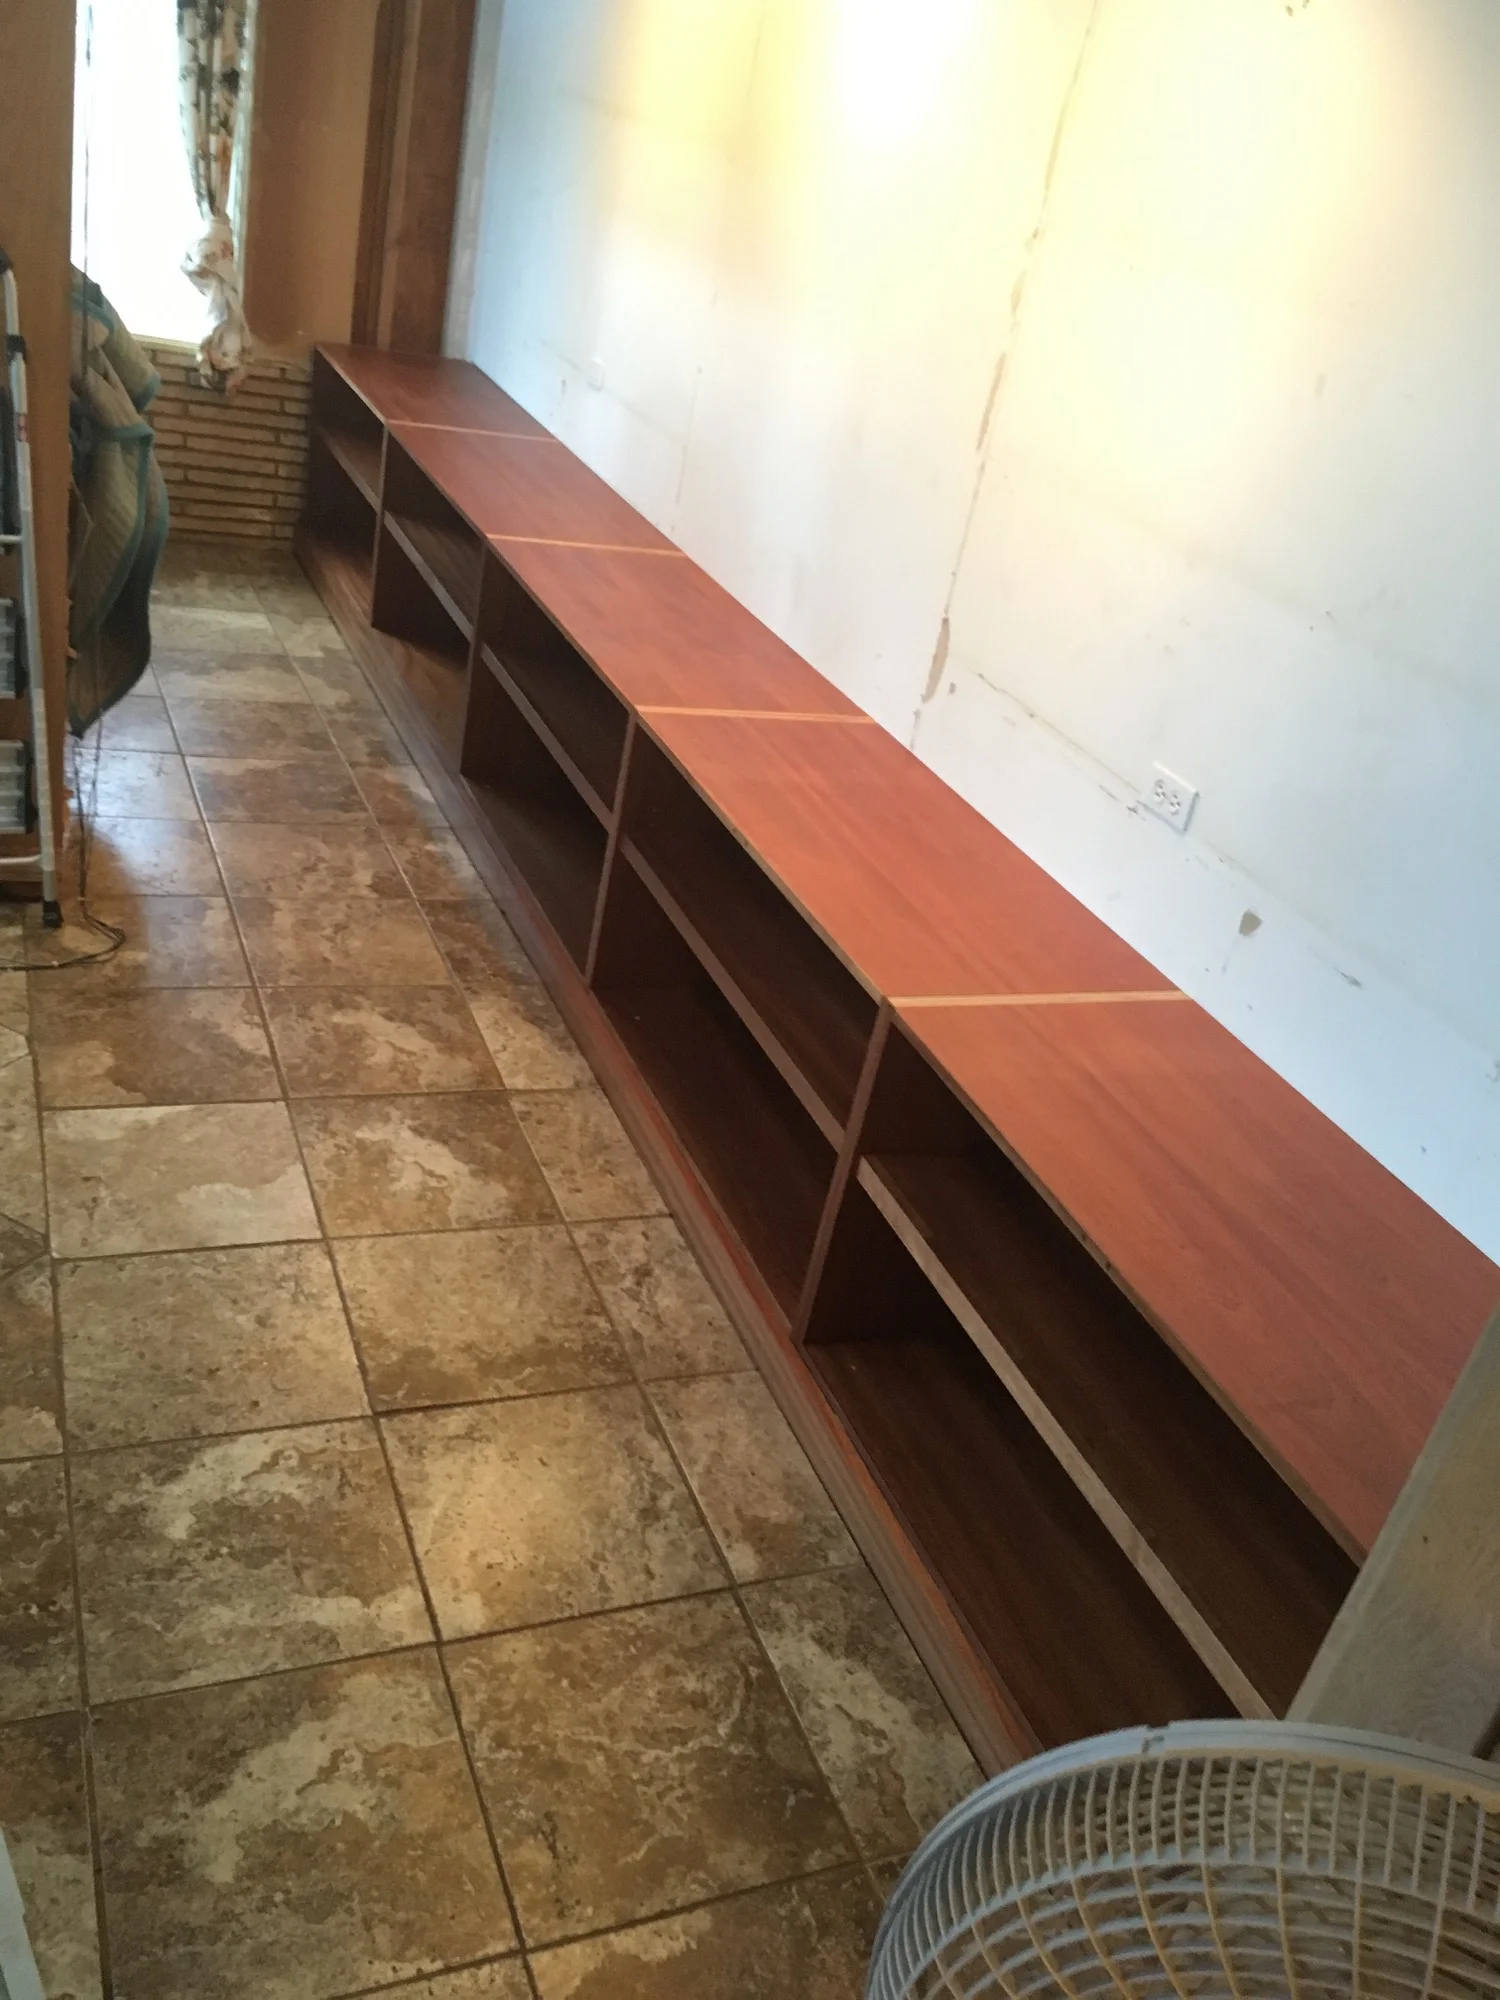
Next, we installed the lower boxes on top of the toe kicks. This is pretty simple and goes quickly, since the toe kicks are all aligned already. The cabinets are secured to the toe kicks with four screws in each cabinet, and later on we will plug the screw holes with matching grain sapele, so they'll virtually disappear.
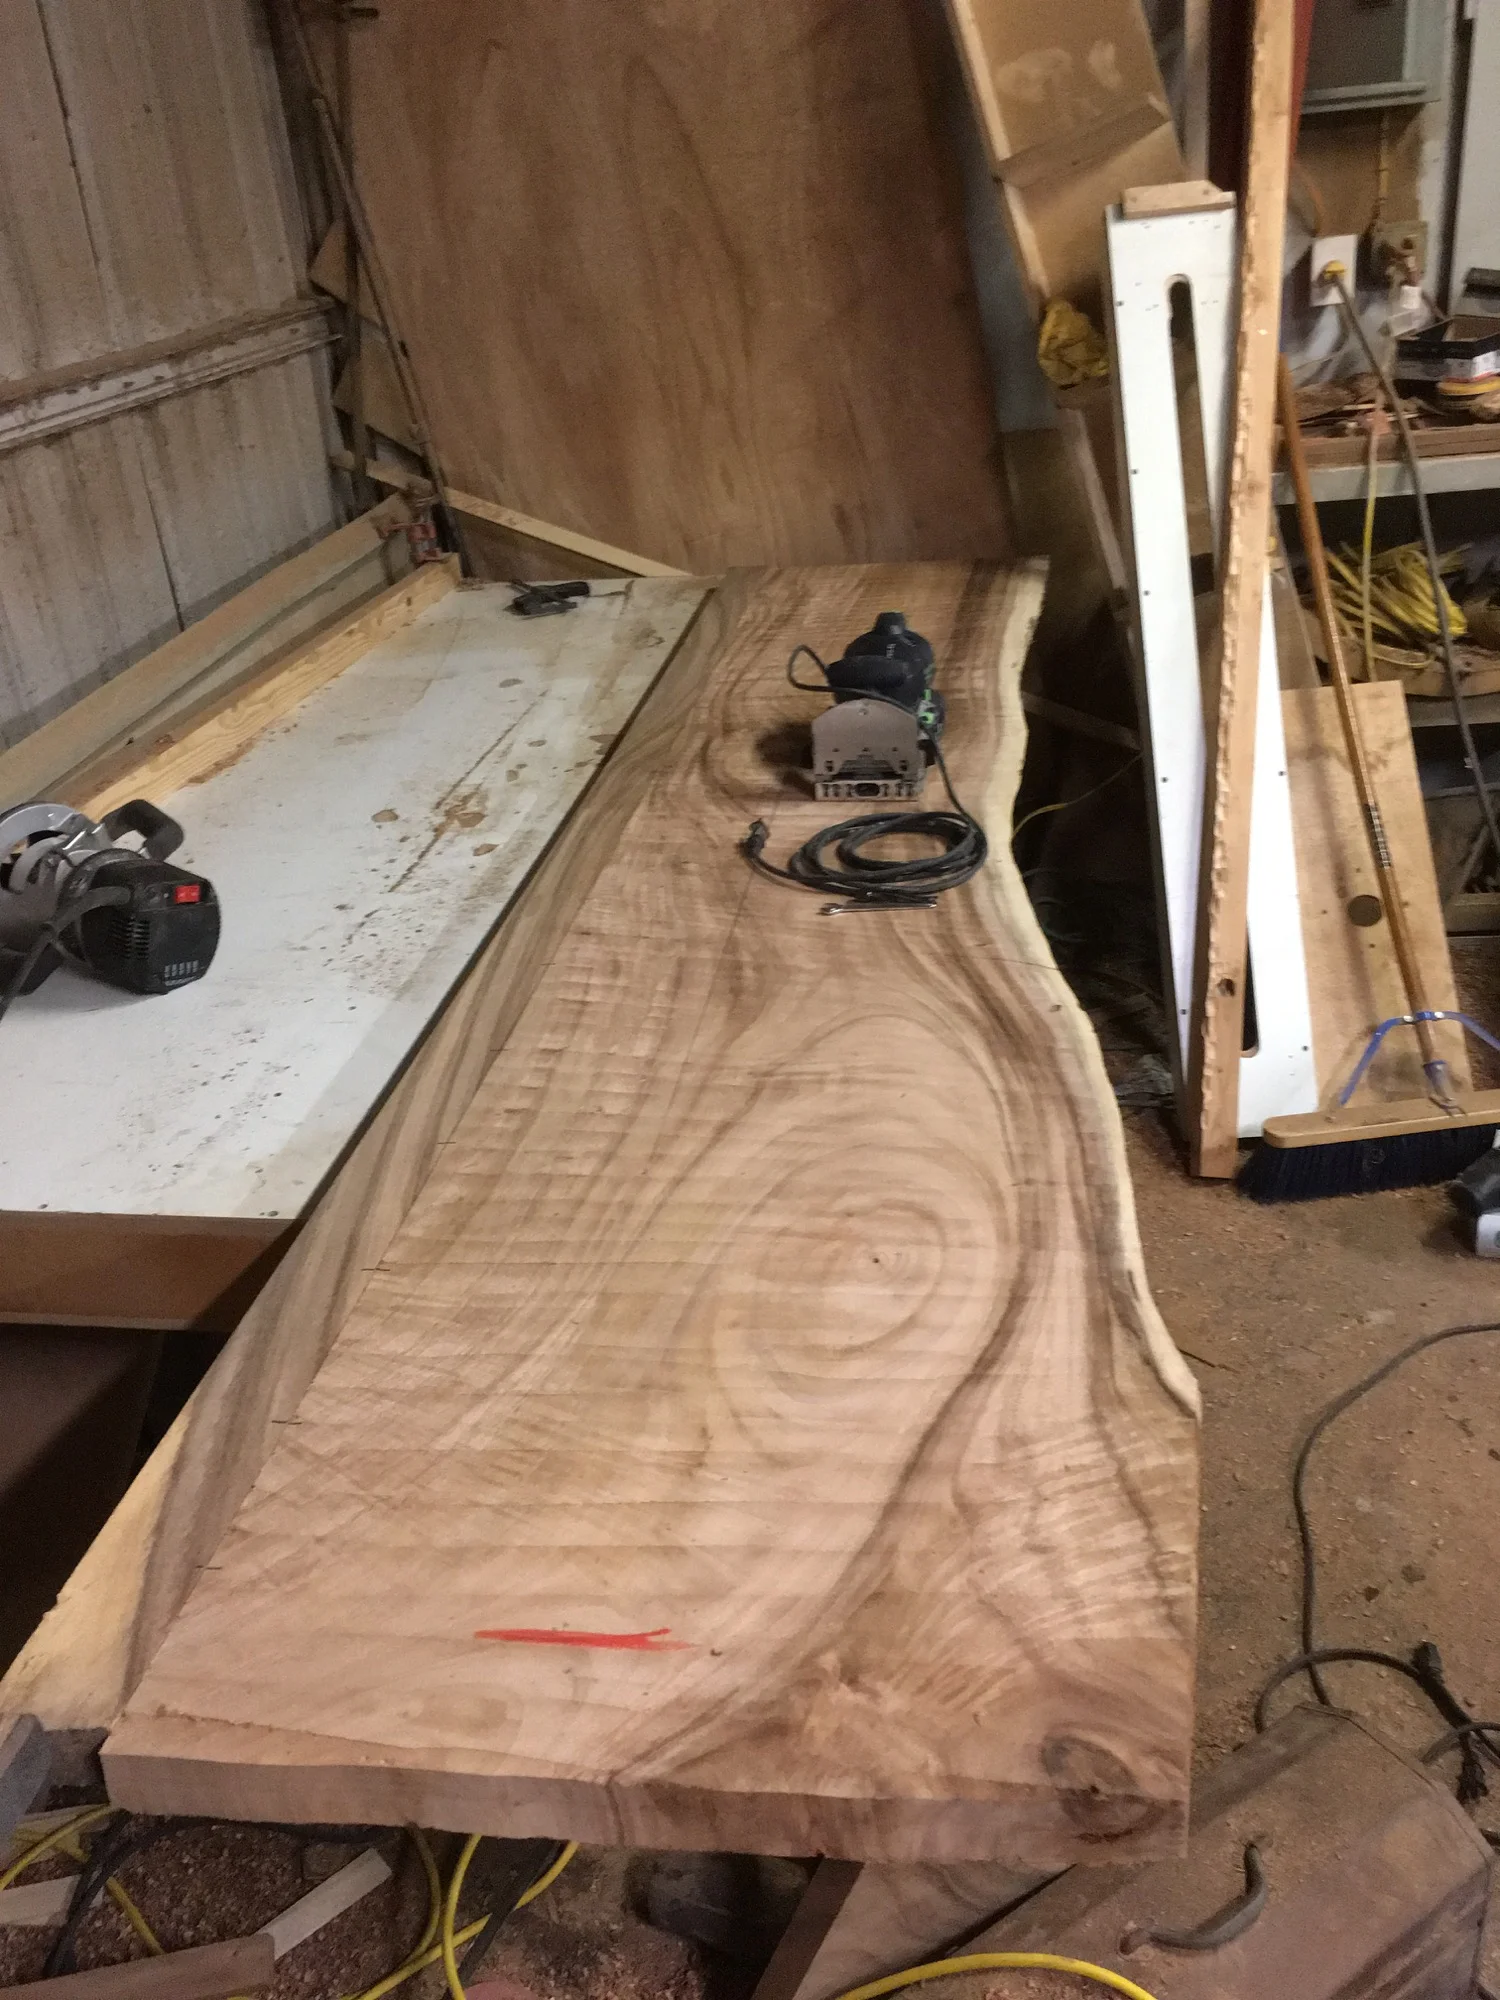
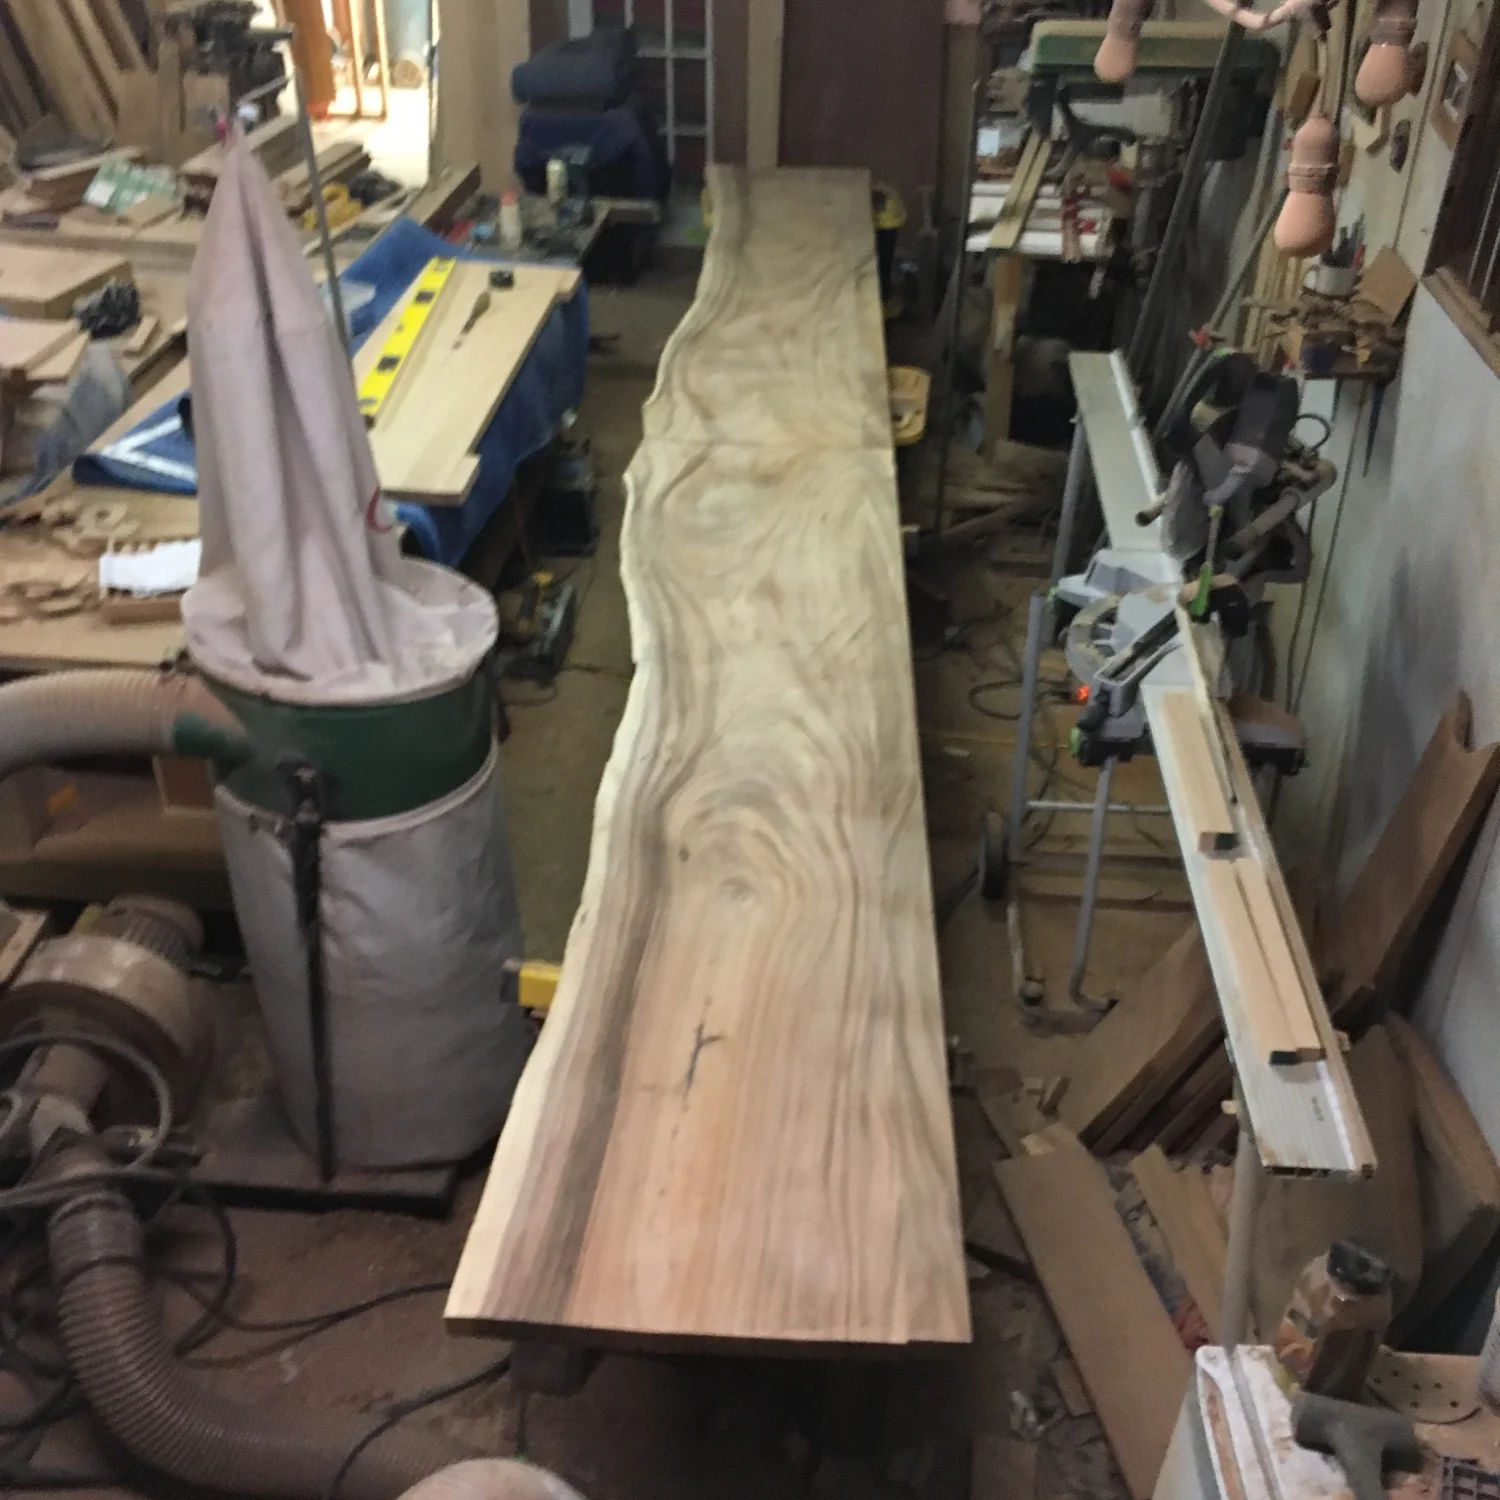
Once the lower cabinets are installed, its time to put the slab on top. First, we have to get this 18' long bookmatched monkeypod slab together. In the below picture, you'll see half of the slab flattened and a rear strip added to give the slab the necessary depth that it needs. The horizontal lines on the slab are from the flattening process, and they will be sanded out in the next step.
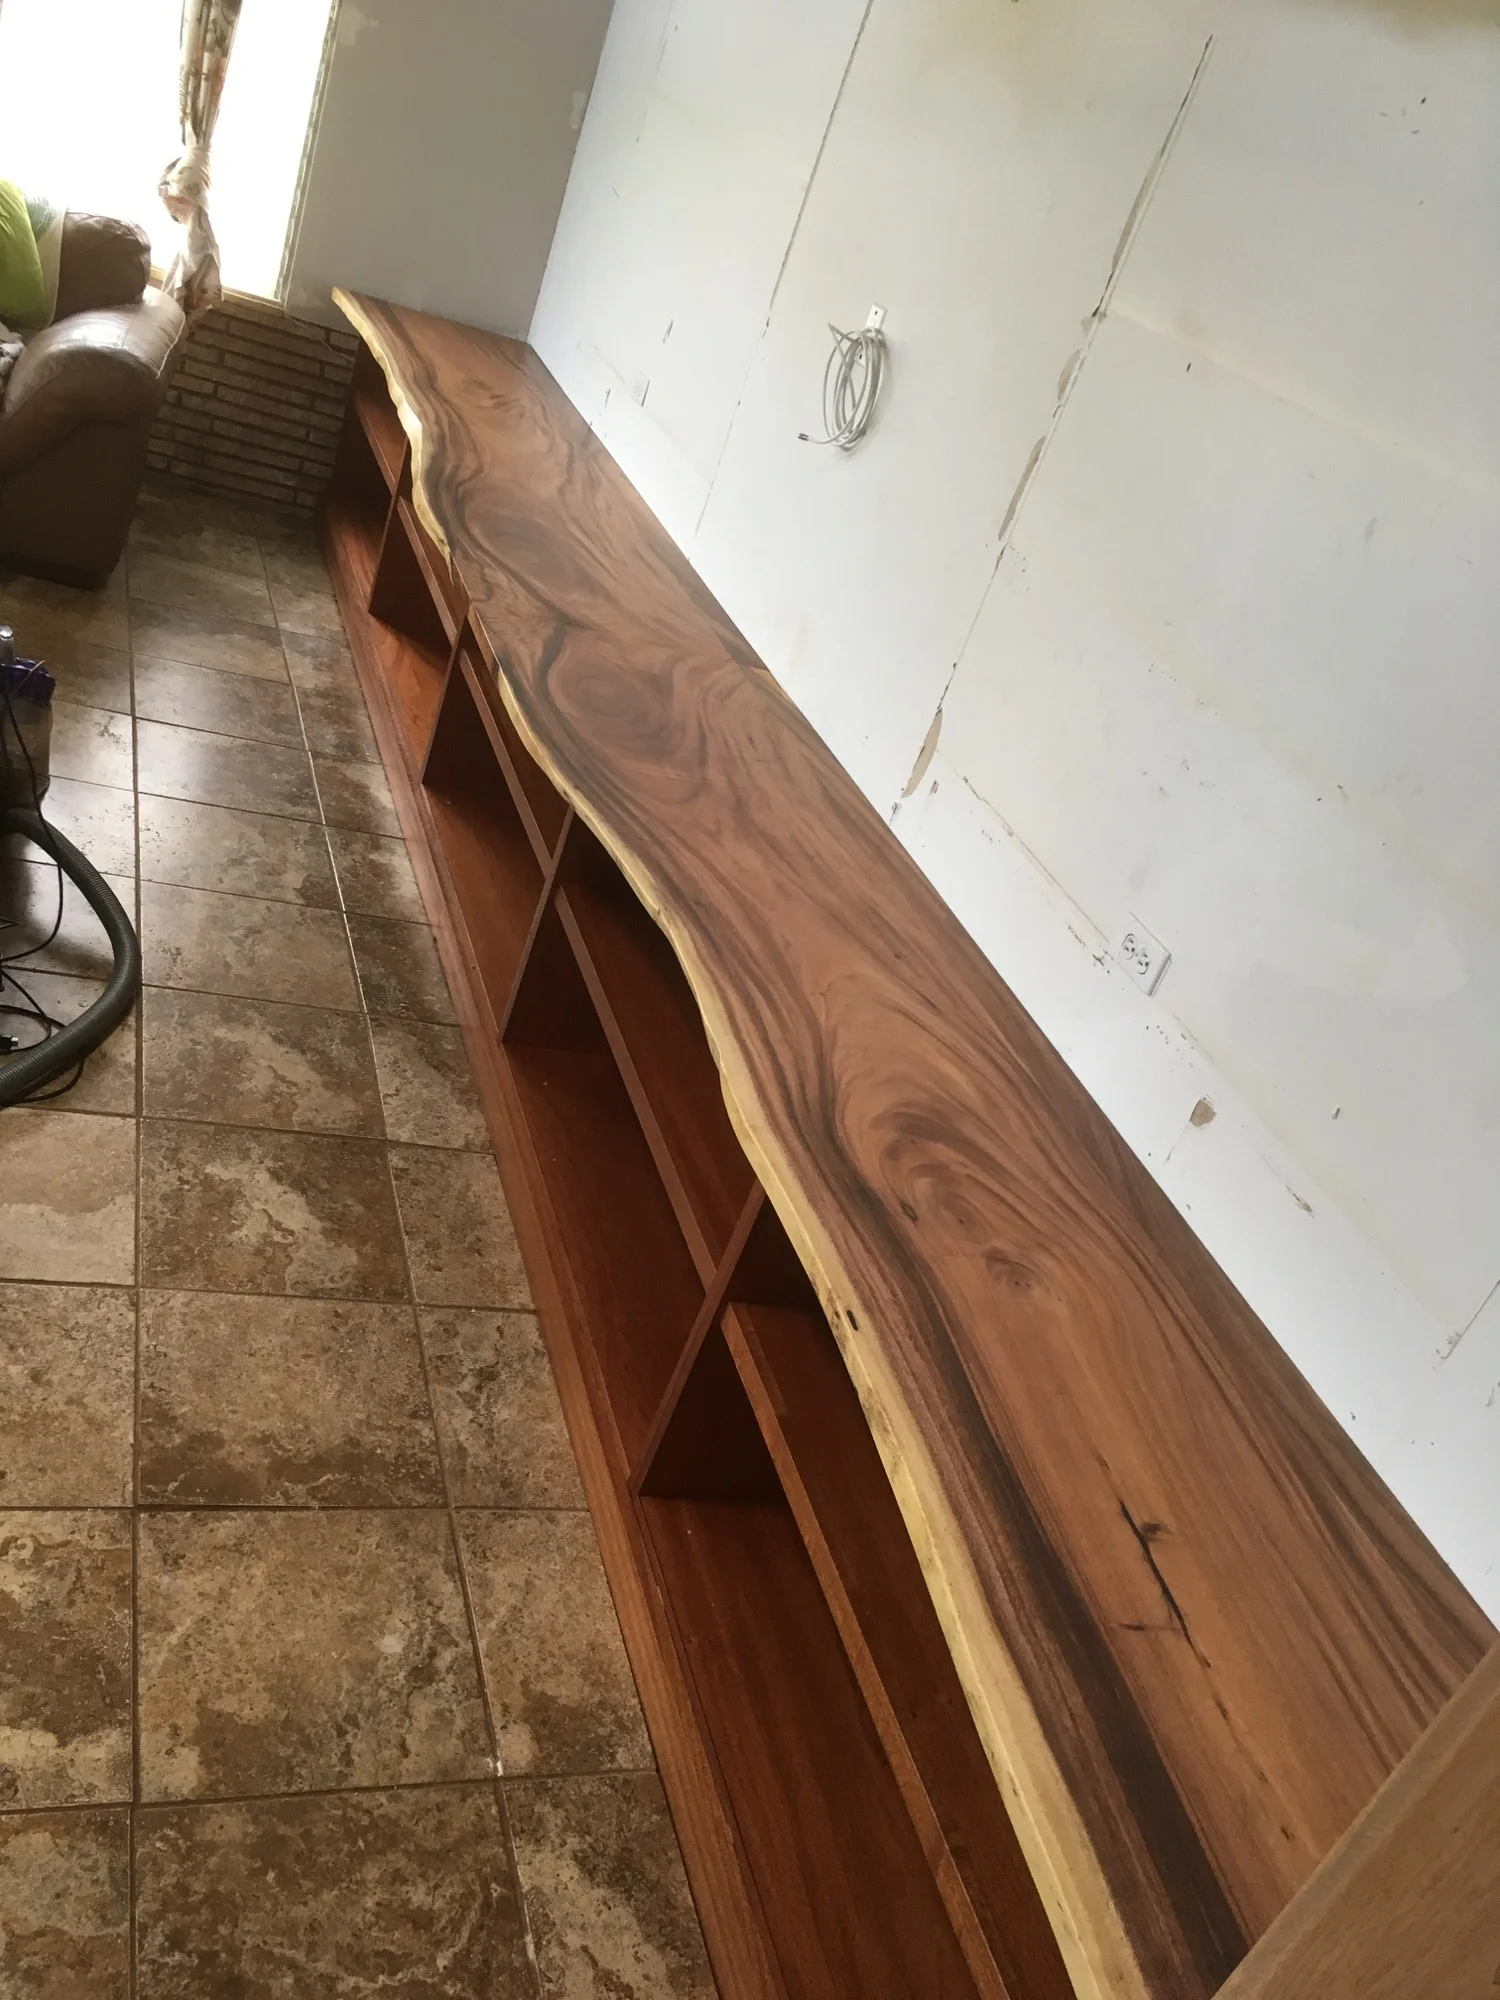
Next, I wanted to set the two slabs up in their finished position, to make final measurements and make sure everything looked how I had hoped. You can see them in their eighteen foot long glory in the below picture. Check out how they mirror each other in the middle of the length. They've been sanded at this point, so you can see how the flattening table lines disappeared. I think that after this photo was taken, all I had to do before finishing was do a final finish sanding and cut the slabs to length.
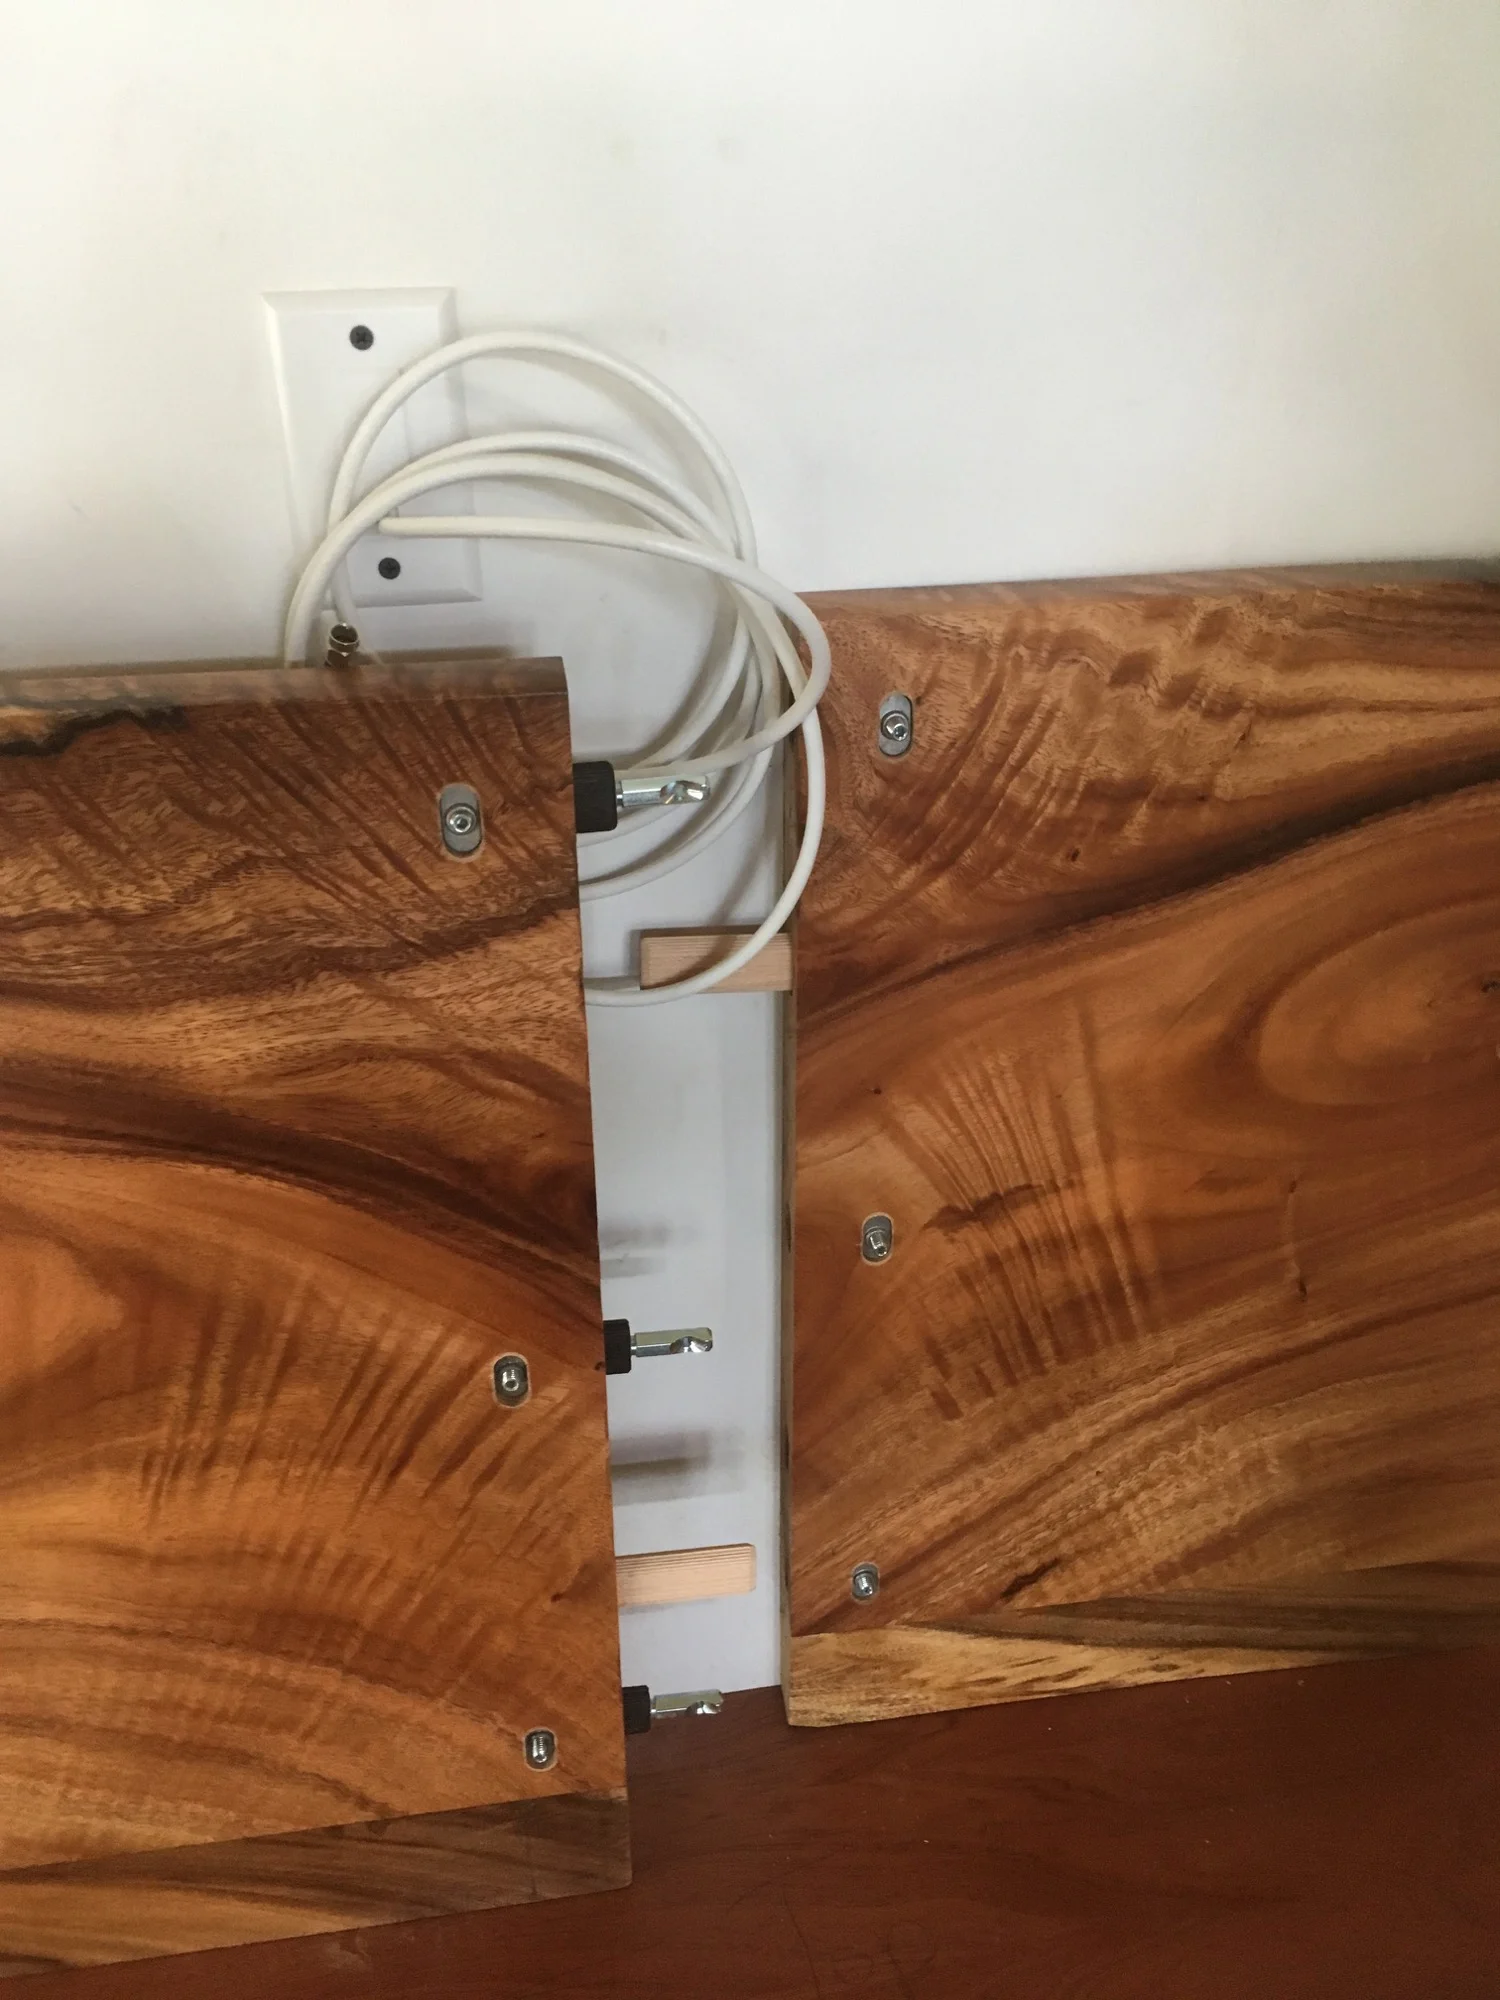
The next picture is a closeup of the connection hardware used to join the two halves together. This is the underside of the slab, so all of this hardware will be invisible in the finished product. Here, we used three mechanical connectors and two wooden domino tenons to perfectly align the joint. Normally, one would put glue on the tenons for extra strength, but that's not necessary here since the slabs are being completely supported by the cabinets.
BOOM, SLAB INSTALLED!
Thats all for now. I'm almost done with the doors, and then there is just a little more trim work to finish up. Thanks for reading!
- bed
- cabinet
- coffee table
- custom
- custom furniture
- dining table
- door
- dresser
- entertainment center
- furniture
- handmade
- hawaii
- honolulu
- kailua
- koa
- local
- made in hawaii
- mango
- monkeypod
- monkeypod made in hawaii furniture custom waimanalo console table bar top coffee table door drawer bed frame mango loa woodworking entertainment center aloha
- side table
- slab
- table
- waimanalo
- wood
- woodworking